|
Rostra Optical Sensing System, ROSS by Jake Morton
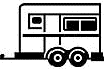
"Another outstanding install article by Jake. We originally received the Rostra ROSS to install on a horse trailer for Western Horseman Magazine. What we found is this particular system with it's larger powerful sensors, was better suited for an RV trailer. We look forward to reviewing a Rostra product for horse trailers in the future." H. Kent Sundling (Publisher.)We’ve all been there at one time or another. You pull into the campsite late at night after a long day of driving. It’s dark and very hard to see behind that 30-foot trailer behind your truck. You back in a little ways, stop and get out to check where you’re at, get back in and so on until you hear the dreaded crunch as your trailer bumper hits some unseen object!Ross has changed all of that with their Rostra Optical Sensing System. This system consists of two optical sensors that you mount on the rear of the trailer or RV and gives you both audio and visual warnings in the cab of the tow vehicle when you’re getting a little too close to something while backing up. It’s a really neat device for people like me who aren’t pros at backing a trailer, especially in the dark! Installation is relatively painless and can be completed in an afternoon. Follow along as I outline how the installation went on my 1986 Vacationeer Fifth Wheel and 1997 Ford F350.
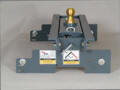
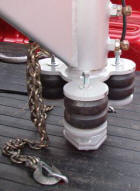
We started by measuring and locating where the sensors will be mounted. They can mount on top or under the rear bumper and come with brackets to install them. I chose to install them below the bumper and actually fastened them to the boat hitch on my 5th wheel camper. I did this so that I wouldn’t have screws protruding into the rear bumper, which would keep me from being able to store my sewer hose there. Piece of cake! Just install the supplied bracket onto the sensor, drill four holes, and install the sensors to the trailer! Next, we found a suitable location for the system’s control module. The module is weatherproof so it can be installed anywhere on the rear of the vehicle. We installed it directly between the two sensors on the floor area of the coach.
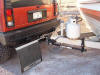
Start by locating the wiring for the back up lights. This is what gives the control module power and allows it to only work when you’re in reverse.
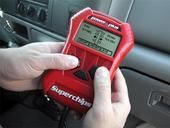
The final step is to test the system and adjust the volume level on the beeper. I started out at full volume which will really wake you up when it goes off! The system will only work when the transmission is in reverse. The vehicle has to be moving or the obstacle behind the trailer has to be moving in order for the system to detect objects. At 10-12 feet away, the system will light one led and give a steady beep. At about 5-6 feet the second led will light up and the beeping gets faster to let you know you’re getting close to hitting something. Within two feet, the third led lights up and the beep turns into a steady tone letting you know to stop NOW!! The system was very easy to install and took about three hours total. No special tools were needed other than a drill, basic hand tools, and a test light.
For more on Rostra's safety products, click here...
|